Decadent Fudge
- Mystie Tanner
- Nov 30, 2024
- 3 min read

Craving something sweet and indulgent, yet healthy and sustainable? This fudge is your answer! This dairy-free alternative is rich, creamy, and versatile. Perfect for satisfying your sweet tooth while staying aligned with your healthier lifestyle, this recipe is simple enough for beginners yet impressive enough to wow guests.
Here’s how to make your fudge that melts in your mouth, with tips for customization and storage.
Why Dairy Free Fudge?
Traditional fudge relies heavily on butter and condensed milk. By swapping these ingredients with plant-based alternatives, you not only create a dessert suitable for vegans but also reduce cholesterol and make it easier to digest. Many plant-based fudge recipes also incorporate natural sweeteners and nutrient-rich ingredients like nuts and coconut, boosting the health benefits without compromising flavor.
Ingredients for Fudge
This recipe requires only a handful of ingredients:
* In a large sauce pan place these ingredients
1.5 cups Almond milk
4 cups Sugar
*In a large bowel put these ingredients
3 cups of semi sweet dairy free chocolate chips
2 cups of marshmallows
2 tsp vanilla
1 cup coconut oil
Step-by-Step Instructions
1. Prep Your Pan
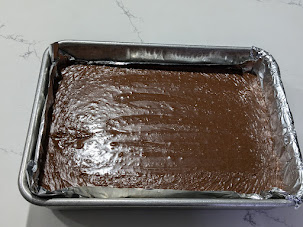
Line a small baking dish (9x9-inch works well) with foil, spray lightly with pam. This makes it easy to remove and slice the fudge later.
2. Place ingredients in large bowl
Put your chocolate chips, marshmallows, vanilla and coconut oil into a large bowl.
3. Boil and Mix
In a saucepan bring your sugar and almond milk to a boil. Boil for 7 min. (whisking the whole time so that your mixture does not burn.) Then pour the hot mixture into the bowl with the remaining ingredients. It will melt it while you use a whisk to mix ingredients until smooth.
3. Pour and Set

Pour the mixture into your prepared pan, spreading it evenly. For extra flair, sprinkle toppings like chopped nuts, shredded coconut, or cacao nibs. (Fudge will set start setting so pour in pan quickly.)
4. Chill
Refrigerate the fudge for at least 2-4 hours or until firm. But can you really wait that long to dive in...... Yes, you can do it!!
5. Slice and Serve
Once set, lift the fudge out of the pan using the foil. Slice into bite-sized squares and enjoy!
We like to put them into min muffin papers to add color and fun.
Customizing Your Fudge
One of the best things about fudge is how customizable it is:
Add a Crunch: Fold in chopped almonds, walnuts, or pecans.
Fruit Twist: Swirl in a layer of raspberry or cherry jam.
Spiced Delight: Add a pinch of cinnamon or chili powder for a unique kick.
White Chocolate Swirl: Drizzle melted vegan white chocolate over the top.
Mint: Add mint flavoring.
Storage Tips
Plant-based fudge stores beautifully:
Refrigerator: Keep in an airtight container for up to 2 weeks.
Freezer: Store in a freezer-safe container for up to 3 months. Thaw for 5–10 minutes before enjoying.
Fudge occasions
For us fudge is a must for Christmas tree hunting (we actually just went Christmas tree hunting today. we took our pan of fudge everyone got a bite before going hunting, when they got back and of course in their hot chocolate), baby showers, girls night, family gatherings, and sometimes just a day that you need a good creamy chocolate fix.
Final Thoughts
Making fudge is a fun and rewarding way to satisfy your sweet cravings without compromising your dietary choices. With a creamy texture, rich flavor, and endless customization possibilities, it’s bound to become a staple treat in your home.
So, gather your ingredients, embrace your inner chocolatier, and whip up this guilt-free delight. Your taste buds will thank you!
What’s your favorite fudge combination? Let us know in the comments below!


Comments